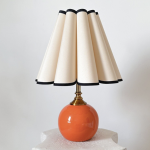
Lamps not only provide illumination, but they can also be a statement piece in your home decor. However, lamps can be expensive, and you may not find a design that suits your taste. This is where DIY comes in handy! By making a lamp from a vase, you can create a unique piece that fits your style and saves you money. In this guide, we’ll show you the steps to make a lamp from a vase.
Step 1: Choose Your Vase
The first step in making a lamp from a vase is selecting the right vase. You’ll need to find a vase that can accommodate a lamp kit. Look for a vase that has a wide base, as this will provide stability for the lamp. You should also consider the height of the vase, as this will determine the height of the lamp. Make sure to choose a vase that matches your style and decor.
Step 2: Purchase a Lamp Kit
Once you have your vase, you’ll need to purchase a lamp kit. A lamp kit contains all the parts you need to make a lamp, including a socket, cord, and plug. You can find lamp kits at your local hardware store or online. Make sure to choose a kit that matches the dimensions of your vase.
Step 3: Drill a Hole in the Vase
The next step is to drill a hole in the vase for the lamp kit. Use a diamond-tipped drill bit to drill a hole in the center of the vase’s bottom. Make sure to measure the diameter of the lamp kit’s socket and choose a drill bit that is slightly larger. This will ensure that the socket and cord can pass through the hole.
Step 4: Install the Lamp Kit
Once you’ve drilled the hole, it’s time to install the lamp kit. Remove the socket from the kit and thread the cord through the hole in the vase. Then, thread the cord through the socket and attach the socket to the vase. Secure the socket to the vase with nuts and bolts provided in the kit. Make sure to follow the instructions provided with your lamp kit.
Step 5: Add a Lampshade
The final step is to add a lampshade to your new lamp. You can purchase a lampshade or make one yourself. Make sure to choose a lampshade that fits the style and size of your vase.


